I'm starting a new quilt today, well, I'm blogging about starting it anyway. Its called a "Bargello Quilt" I think it has something to do with the movement or pattern.
Again, I have to say thanks to Jenelle Kent at Pieces to Treasure, for spending so much time with me figuring out what I wanted to do, and she is great at picking colours out of her vast array of fabrics. I really don't think, I'd want to have to figure this out on my own! It would take twice as long and I'm sure I wouldn't be as completely happy with my own selections. She has such a gift.
So here is the pattern 
And here at the stars of the show. This quilt will be created with some deep blues and creamy colours.

To begin this beauty, I'll start by cutting all this fabric into 2 1/2 strips...
I better get cutting... stay tuned!
Tuesday, May 26, 2009
Bargelo Beauty
New Legs!
I finally got the legs my duns dreamt of! Just wanted to show them off.
Before - You can see that 1) they don't match; 2) they don't match the wood of the drums; 3) they are made from what looks like floor moulding, nail holes and all. I wasn't all that happy with them.
After: Look at these fantastic things! The wood matches, and the new legs are a lot more stable than the old ones. These are the legs that were meant to be on these drums!
Thanks to Graham for his "craftiness" and for making my drums look the way they're supposed to.
Monday, May 18, 2009
Back to Cards
Back in October, I went with Michelle to a big paper craft weekend. We had a great time and the following are my results. Funny thing is, I took off right out of the gate and had heaps of cards on Michelle, but in the end, at the last day, she had me, of course, just like always, she made double what I did, and hers are always a lot more intricate than mine. I wish I had some of hers to show you.
So here we go. This isn't all of them, and the pictures are mostly blurry, so sorry about that, but you still can get the idea of what they looked like. I PhotoShopped the heck out of them just to get something I could use... got a new camera in the US, too bad I didn't have it in October! 
I used Michelle's Cuttle Bug to create this beautiful textured background paper. I have to get one of these things.

This stamp was so cute, but I overworked the auqwash pen on the cake and ended up buckling the card stock, so to fix it, we made the buckling more pronounced and put foam tape on the back of it so cake stayed uniformly puffy. I also used Kindy Glitz to shiny it up a bit. The Happy Birthday is stamped in black, then over stamped with VersaMark and embossed with clear embossing powder. You'll notice there's also some handmade pink paper in a strip behind the stamped part, and little pink flowers stamped all over.

My favorite card I made, all weekend, was the one on the left. The card stock was a very light green and I put it through Michelle's Cuttle Bug for the embossed look. Then I stamped the tree and the greeting in a deep garden green. When it was dry, I Kindy Glitzed the tiny leaves on the tree. I love the tree, and it was an inexpensive stamp!
The card on the right, I had the flower brad and was lucky enough to find paper to match in my box.

Another couple of stamps I bought just for that weekend. The Birthday stamp and the cute little bird.

The card on the left was the first one I made, followed closely by the one on the right. The one on the right has acetate fastened on with the flower brad. The Happy Birthday is stamped on the acetate. I thought it was a cool idea. Unfortunately it was the only card that worked that way, proving that once you have a good idea, it might not work again the second time around!

These two cards were simple and quick as. The lavender one was just card stock ran through the Cuttle Bug for the embossing. I put a little Kindy Glitz on it and hand wrote Happy Birthay, and added the gross grain ribbon. The one on the right was even quicker. Patterned paper with Kindy Glitz and a chiffon ribbon. Simple.

Another simple, quick card. Again, patterned paper, a bit of glitz, a bit of ribbon and a couple of brads.

Gotta love that Cuttle Bug!
Even Birdies Need Crafty Stuff!
Before we left for our month long holiday, I figured I'd better make a good woody toy for Tirsa so she didn't drive the fiddy sitter mad.
I just took the old toy that I had made a couple months ago and replaced a lot of the toy parts with new bits. I get most of these new pieces from Fowl Play. I think they are really good value and of excellent quality. Check out their site, if you have chewy feathered friends. If I would have thought about it first, I could have made the blocks read her name. Oh well, next time, I'm sure she didn't catch it.
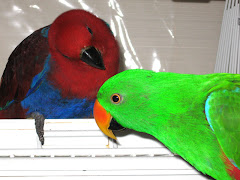
In fact, I think she rather liked it.  "Hmm, this looks yummy!"
However, like most kids, she liked the box as well. 
The BEFORE
picture
Of course I
took all of the
tape and
stickers off
3 days into it
The AFTER
no, really, she DID

In fact, she looks rather proud of herself, don't you think? I think if I could have heard her thoughts, she would have been saying "it's still mine!"
She literally worked on this for 10 days straight. She has to be the most determined bird I have ever met! And it's taught me that she's a cheap bird, give her the box instead of the expensive toys and she's just as happy! Just like a human kid.
Crafty Friends 2 The Price of Friendship
My best friend has always been a blessing to me, and she has taught me many many things about being crafty.
Every year for our birthday's and Christmas, we have vowed that we would never just buy something for each other, but spend time creating something from our hearts.
This year for Christmas she created a beautiful bag for me. Michelle doesn't sew, she hates it, but she also knows that I've been quilting for over a year now and wanted to put her hand to it, just for me. Not many people in our lives would completely go against their better judgement to try to create something, when they have no idea how to go about it... oh wait, I guess I did that, didn't I? Well this is just one more way we are so alike.
So after researching and looking for a pattern, dragging out her old sewing machine, and probably having to learn how to use it again, and through all the tears of frustration, and temper tantrums (I know those tantrums, been there, done that), this is what she came up with for my Christmas present this year. Honestly, I think she did a beautiful job and I so appreciate all the work that went into it.
The front
The back 
And she even quilted it! 
I use it for my drumming bag, to tote my sticks and accessories in. It gets a lot of use!
Thanks again Michelle!
Crafty Friends 1
Since this is a crafty blog, over the next two posts, I'm going to share some craftiness from a couple friends.
This first one, the gentleman that created this masterpiece is a dear, dear friend of mine. His son in law is in a band and picked up this guitar and asked Mike if he would do some feather work on it. Because I wasn't there, I couldn't tell you the exact conversation, so don't quote me... The guitar had all the hardware taken off and it was sanded down to bare wood, then feathers were carefully placed and glued on. After that, there were several coats of resin (don't quote me on this either), and it was hand sanded and finished to the perfection you see here, then all the hardware was added back on.
Anyway, this is the final result, and I think it turned out gorgeous, and the son in law agrees with me!  I believe the feathers are grouse.
Lets get updated!
It's been a while, and in that time away, I've gotten to spend a month in the US with family and friends. That's always a good thing. So I know I will be forgiven for being slack.
The first thing I want to share is the finished quilting project I was working on last year. It was the red, black and white quilt. I finally finished it and it was given to the happy couple on their wedding day... yes, I made the deadline! Yay me!
So here it is in the actual quilting process. I drew out the leafy patterns on grease proof paper and carefully pinned it onto the quilt, where it was to be quilted. 


and lo and behold I had
I'd be lying if I said the
But I learned a lot and
This is where the quilt is cut down and squared up.

An this is where the binding comes in.


With the binding, I had a bit of trouble getting it on the quilt right. I had sewed one side on and realized that it felt wonky and the reason was, it was sewed on just slightly crooked. Slightly always makes a huge difference in the end, it always ends up being a much bigger issue if it's not fixed in the beginning. So I took the binding off, I'm becomming the queen of un-sewing, and drew my quarter inch seam on and began the re-sewing. When I was done, it turned out brilliantly, I was glad I fixed it sooner rather than later. The binding went on beautifully and properly. I would suggest that if anyone has the slightest problem sewing a straight line, you draw your quarter inch line on before sewing. It makes the process a lot easier and quicker.
This is the finished product, and I'm happy to say that the couple is really happy with it. I hope they get lots of use out if it. It's going into winter here in Australia so it's probably well timed.